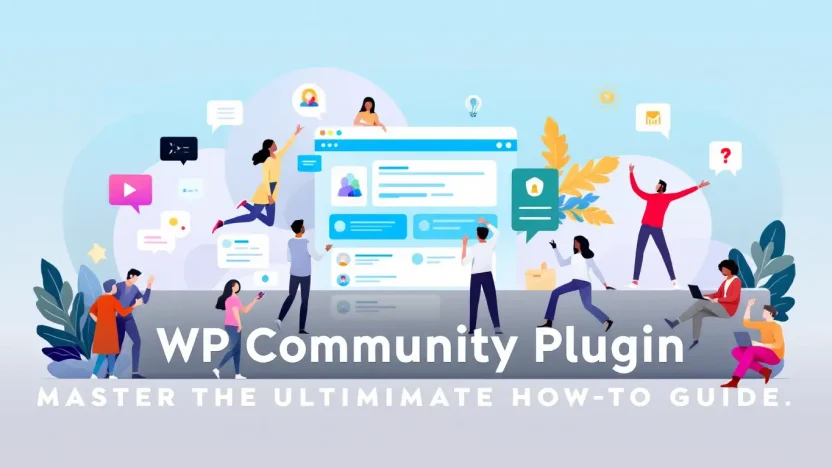
Are you ready to revolutionize your WordPress site? Enter the world of the WP Community Plugin, where enhancing user interaction is just a click away. Whether you’re a seasoned developer or a WordPress newbie, mastering this powerful tool can elevate your website to new heights.
Understanding how to integrate and maximize the WP Community Plugin is crucial for anyone looking to build a thriving online community. This ultimate how-to guide is designed to simplify the process, offering actionable insights and step-by-step instructions to ensure you achieve your website goals. Let’s dive into the details and transform your WordPress experience.
Table of Contents
- Introduction to WP Community Plugin
- Installing the WP Community Plugin
- Setting Up Your Community Features
- Customizing User Profiles
- Enhancing Interactivity with Plugins
- Best Practices for Community Engagement
- FAQs
- Conclusion and Next Steps
Introduction to WP Community Plugin
Have you ever wondered how to build a thriving online community within your WordPress site? The WP Community Plugin is the answer. Tailored for creating interactive user experiences, this plugin transforms your website into a bustling hub of activity. Whether you’re a seasoned developer or a beginner, understanding how this tool can revolutionize your site is essential.
One might ask, “What exactly is the WP Community Plugin?” In essence, it’s a powerful tool that allows you to add social functionalities to your WordPress site. From forums to private messaging, the WordPress community plugin is designed to enhance interaction and boost user engagement.
Why Choose WP Community Plugin?
The world of WordPress is brimming with plugins. So, why choose this one? First, it’s incredibly user-friendly, making it easy for even the most non-tech-savvy individuals to craft vibrant communities. More importantly, the WP Community Plugin integrates seamlessly with your existing WordPress framework, reducing headaches and maximizing efficiency.
- Boost Engagement: By facilitating social interaction, your site becomes more engaging, increasing visitor retention.
- Scalable Solutions: As your community grows, the plugin adapts, handling increased traffic effortlessly.
It’s no wonder that many top sites use this plugin to enhance their digital communities. Explore expert opinions and in-depth reviews on top plugins like Best WordPress Social Community Plugins.
Discover more about Best WordPress Addons to unleash the full potential of your site.
By the end of this guide, you’ll have the insights and actionable knowledge to transform your site using the WP Community Plugin. Let’s dive deeper into mastering its features!
Installing the WP Community Plugin
Getting started with the WP Community Plugin is straightforward, even if you’re new to WordPress. This guide will take you through each step for a seamless installation experience. Whether you’re building a social network or a community forum, this plugin can transform your WordPress site into a buzzing community hub.
- Navigate to Your Dashboard: First, log into your WordPress dashboard. This is your command center for all things WordPress.
- Access the Plugin Directory: On the admin sidebar, click on ‘Plugins’ and then ‘Add New.’ This brings you to the plugin directory, a treasure trove of possibilities.
- Search for the WP Community Plugin: Use the search bar in the top-right corner and type in ‘wp community plugin.’ The plugin should appear in the results.
- Install and Activate: Click ‘Install Now’ next to the plugin. Once installed, hit ‘Activate’ to bring your new community features to life.
Troubleshooting Common Issues
If you run into any problems during installation, don’t panic. Ensure your WordPress version meets the plugin’s requirements. Also, check out Fluent Community for helpful resources and support.
Installing the WP Community Plugin enhances your site’s functionality and connects users intuitively.
Looking to amplify your WordPress site’s capabilities even further? Discover our guide on the Best WordPress Addons for additional tools that can enhance your site.
| Step | Description |
|---|---|
| Step 1 | Log into your WordPress dashboard. |
| Step 2 | Go to ‘Plugins’ > ‘Add New’. |
| Step 3 | Search for ‘wp community plugin’ and install. |
For a deeper dive, check fashion-defining plugins at Nexcess or explore top social features at MobiLoud.
Setting Up Your Community Features
Embarking on your journey to build an engaging online community with a WP Community Plugin? You’re in the right place! This guide will walk you through setting up the must-have features your community needs to thrive.
-
Installing the Plugin
First, ensure you have installed your WordPress community plugin properly. Navigate to your WordPress dashboard and select Plugins > Add New. Search for “wp community plugin,” click Install Now, and then Activate.
-
Configuring User Profiles
Setting up robust user profiles is crucial. Go to the Settings tab of your WP Community Plugin and decide what details members can share. Will they upload avatars or link their social media? The choice is yours to make your community personal and engaging.
-
Creating Discussion Forums
Forums are where the magic happens! Head to Forums > Add New in your plugin’s settings. Here, you can establish multiple forums, each with dedicated topics that cater to your community’s interests.
-
Integrating Social Sharing
Your audience deserves the chance to spread the word. Enable social sharing features by accessing Social Options. Allow members to share content with just a click, amplifying your community’s reach.
-
Adjusting Moderation Settings
Ensuring a safe environment is vital. Head to Moderation under your plugin settings. Here, configure permissions and filter out spam posts before they take root.
Key benefit of a WP Community Plugin: It transforms your website into a dynamic social hub.
For comprehensive details, check our guide on Best WordPress Addons: Unleash Maximum Potential with These Essential Tools to enhance functionalities further.
Ready to create a thriving community enriched with dynamic features? Dive deeper with resources at Nexcess and find plugins that suit you best like Fluent Community.
Customizing User Profiles
Enhancing user profiles is crucial for building a vibrant community on your WordPress site. The WP Community Plugin makes this process a breeze, allowing you to add a personal touch to every profile. Here’s how to customize user profiles with this powerful tool.
- Access Profile Settings: Navigate to the WP Community Plugin dashboard and select ‘Profile Settings.’ This is where you can enable various customization options.
- Choose Profile Fields: Add or remove fields according to your needs. Elements like bio, social links, or avatars help enhance user interaction.
- Design Layout: Use the built-in layout editor to adjust the look and feel of profiles. Choose colors, fonts, and structure that align with your site’s theme.
- Preview Changes: As you make adjustments, use the preview feature to ensure your profiles look professional and engaging before publishing.
With these steps, your WordPress Community Plugin will not only foster engagement but also create a personalized experience for every user. Remember, customizing profiles is just one way to amplify your community. Explore more in our guide on best WordPress addons and unleash your site’s full potential!
Key benefit: Personalized user profiles enhance community interaction, encouraging users to connect and contribute more actively.
Consider additional resources at MobiLoud to explore plugins that complement your customization efforts.
Enhancing Interactivity with Plugins
Ready to transform your site’s interactivity? Leveraging the wp community plugin can instantly add a vibrant social dimension to your WordPress site. But how exactly do you go from a static site to a bustling online community? Let’s dive in.
1. Choose the Right Plugin
There are numerous plugins available, but not all are created equal. Look for a wordpress community plugin that aligns with your site’s goals. Consider features like user profiles, forums, and activity streams.
2. Install and Configure
After selecting the right plugin, the next step is installation. Navigate to your WordPress dashboard, select ‘Plugins,’ and ‘Add New.’ Once you find your chosen plugin, install and activate it. Don’t forget to configure settings such as roles, access levels, and privacy to fit your community’s needs.
3. Customize for Engagement
Customization can dramatically enhance user interaction. Adjust colors, layouts, and functionalities like direct messaging or email notifications. By tailoring your wp community plugin to fit your brand, you’ll create a more inviting space for users.
Tip: Continuously test different setups through your plugin’s analytics to find what keeps your community thriving.
For a deeper exploration into maximizing your site’s potential with plugins, check out our guide on Best WordPress Addons.
Key benefit of using wp community plugin: Engages users through interactive features, leading to increased site traffic and user retention.
Best Practices for Community Engagement
Engaging your community effectively using WP Community Plugin not only fosters interaction but also strengthens your brand’s online presence. Let’s explore actionable strategies to maximize your community engagement.
- Encourage Participation: Use prompts, polls, and questions to invite active responses. A lively discussion catalyzed by your wordpress community plugin keeps the community vibrant.
- Recognize and Reward: Celebrate milestones by highlighting contributors. Consider offering shoutouts or badges powered by the wp community plugin features to appreciate active members, thereby boosting motivation.
- Provide Valuable Content: Regularly share resources that matter. Link relevant articles like this overview on best WordPress addons to give depth and value to discussions.
- Moderate with Attention: Ensure a friendly and respectful environment by moderating discussions. Tools from FluentCommunity can automate moderation and keep your space safe.
Leverage Analytics
Use built-in analytics to monitor active threads. Discover which topics resonate and adjust your strategy accordingly.
Key benefit of using WP Community Plugin: Instantly foster meaningful interactions and community trust.
Stay Inclusive
Incorporate diverse viewpoints by creating sub-groups within your community. This encourages everyone to express themselves freely, using plugins found here to support these enhancements.
FAQs
What is a WP Community Plugin?
A WP community plugin transforms your WordPress site into a vibrant community platform, enabling features like user profiles, activity feeds, and forums. It’s tailored for interactions and connections, enhancing user engagement.
How do I install a WordPress Community Plugin?
To install a WordPress community plugin, navigate to your WordPress dashboard, click on ‘Plugins’, and select ‘Add New’. Search for the desired plugin, click ‘Install Now’, and then ‘Activate’ to launch your community.
Can I customize WP Community Plugins?
Absolutely! WP community plugins often come with customization options to align with your brand’s aesthetics. Explore each plugin’s settings to configure design and functionality to your liking.
Which WP Community Plugin should I choose?
The right choice depends on your needs. Consider plugins like BuddyPress or PeepSo for robust features and user-friendly interfaces. Explore comprehensive reviews to make an informed decision.
Are there free WP Community Plugins?
Yes, there are free WP community plugins available, offering essential features at no cost. Check out articles like this one to discover popular free options.
For more insights into enhancing your site with powerful WordPress tools, explore our guide on Best WordPress Addons and unleash maximum potential.
Conclusion and Next Steps
As we wrap up this guide, it’s clear that mastering the wp community plugin is not just about following steps it’s about unlocking the full potential of your WordPress site. By now, you understand the power that lies in cultivating an engaged community within your own digital space. Still, where do we go from here?
The first step is to implement the best practices we’ve outlined. Customize your community settings, explore features, and don’t hesitate to experiment with different functionalities. These actions ensure you’re fully leveraging the capabilities of both the wp community plugin and your broader WordPress ecosystem.
To continue your learning journey, consider exploring this guide on essential WordPress addons that can further enhance your site’s performance. Each addon can complement your WordPress community plugin and provide even greater value to your users.
Remember, the success of your community relies on continuous engagement and adaptation.
If you’re looking for more insights, check out these community-focused plugins and themes, or explore the detailed features at Fluent Community.
Embrace the challenge ahead; each step you take is a leap towards building a vibrant and connected community. Welcome to your new role as a community leader—you’re ready to lead!


